If you found yourself in possession of 3 of the top Frozen Ice Cream Makers on the market, what would be the first dessert you made?
In my case – as a responsible parent – I decided to let my 5-year-old choose.
Was I putting my tastebuds at risk, or could this have been the finest moment in my dad-career? Read on to find out as we make desserts with the Ninja Creami Ice Cream Maker, Breville the Smart Scoop Ice Cream Machine and Cusiniart Cool Scoops Ice Cream Maker.
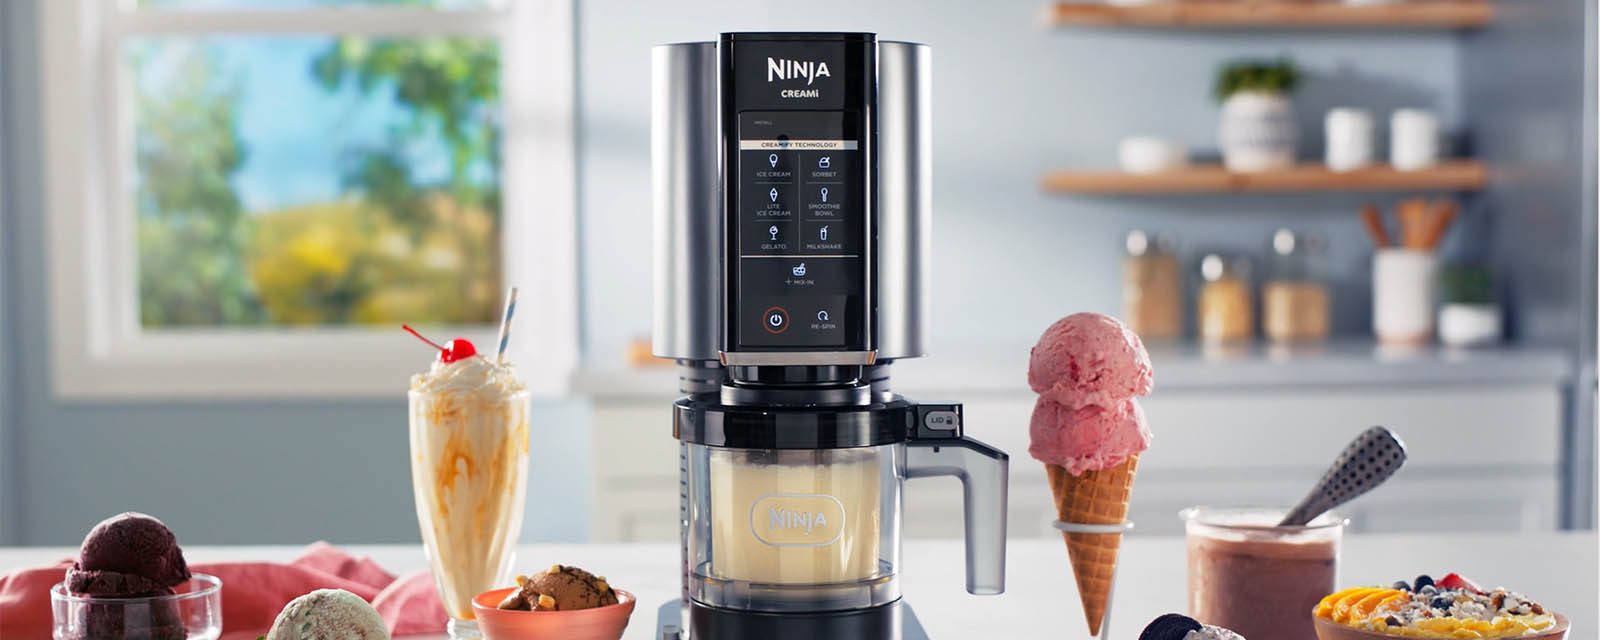
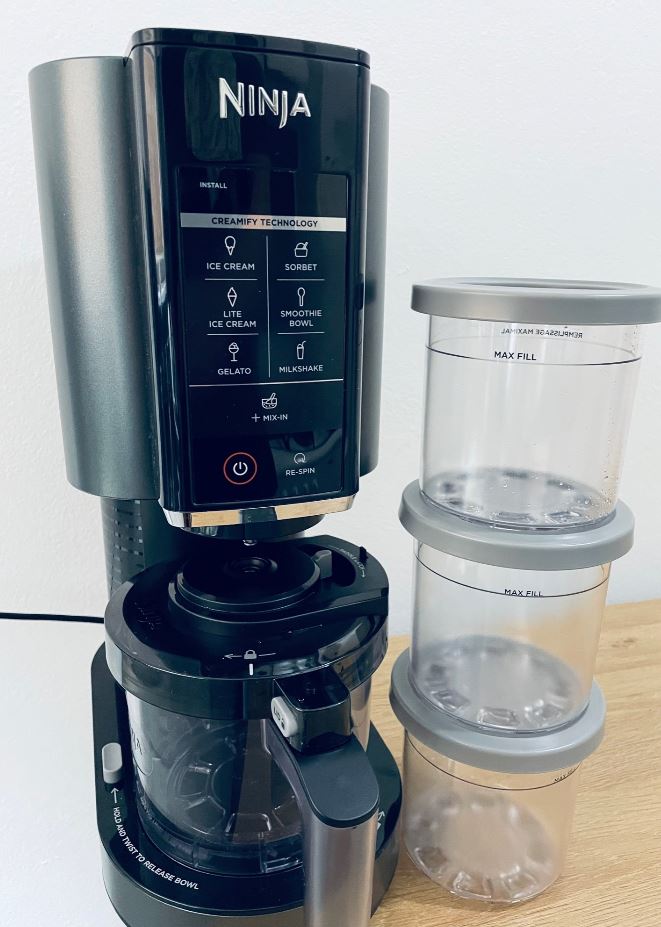
Dessert Maker #1: Ninja Creami Ice Cream Maker
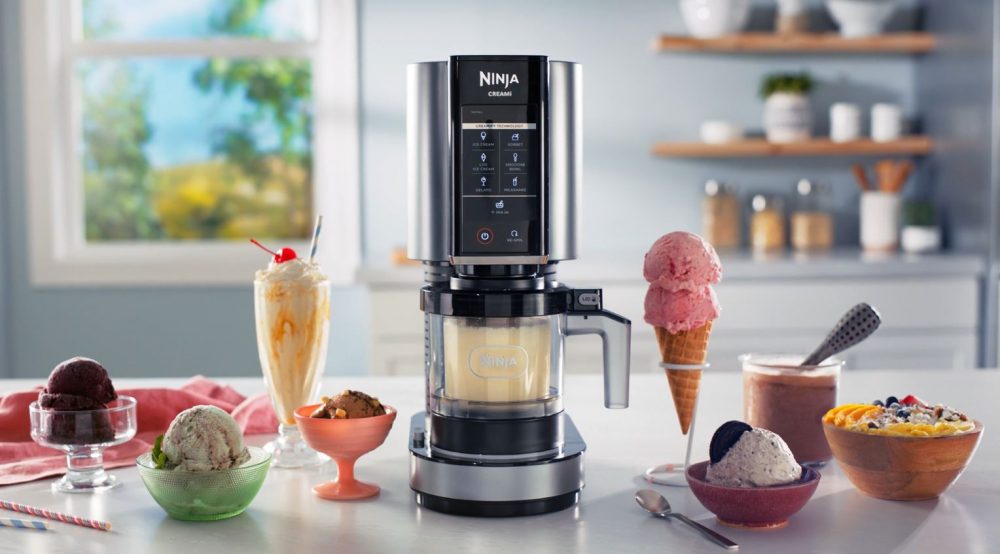
What’s awesome about the Ninja Creami Ice Cream Maker
• Easy to make a wide range of desserts at the touch of a button – includes 7 one-touch programmes for Ice Cream, Sorbet and much more.
• Can turn almost anything into a creamy, delicious Gelato, Milkshake and more with Creamify™ technology.
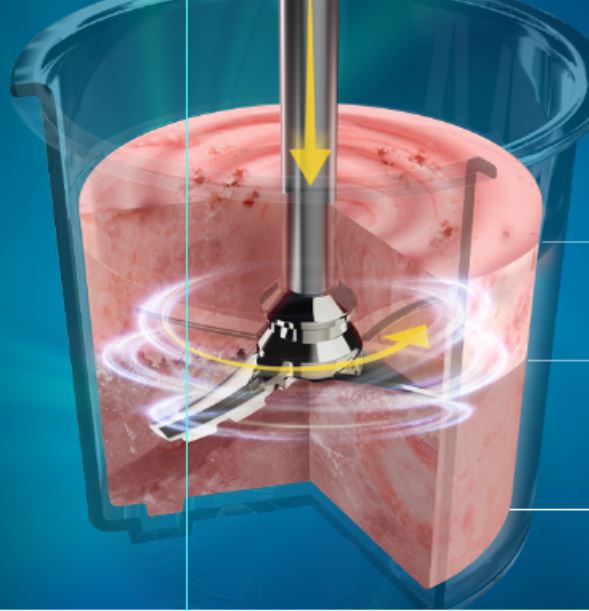
• Breaks down uniform frozen blocks into incredibly smooth and creamy textures – this is thanks to Dual Drive Motors that apply downward pressure and spin the Creamerizer Paddle which finely shaves and churns ice particles.
• 3 Tubs are included. You can use the Tubs to prepare and store ingredients in the freezer. Then, when you’re craving ice cream, your ingredients will be ready to go at the press of a button!
Which dessert to make with the Ninja Creami Ice Cream Maker?
The Ninja Creami Ice Cream Maker offers a seriously large collection of dessert styles to choose from. There‘s functions for ice cream, lite ice cream, gelato, sorbet, smoothie bowl and milk shake. Plus a mix-in function, so you can add additional ingredients to recipes throughout the creation process.
This wide range of functions gives you the ability to create desserts that are tailored to your family’s diet and lifestyle – whether you’re vegan or dairy-free, after a high-protein dessert or another customised option.
Ninja provides a selection of great recipes for the various functions in the Creami’s instruction manual. Plus, their website – Ninja Test Kitchen – features a huge number of fresh, mouth-watering recipes.
I read out a selection of recipe ideas from the Ninja Test Kitchen for my daughter.
Fresh Mixed Berry Sorbet. Mixed Fruit Smoothie Bowl. Coconut Chai Ice Cream.
After hearing from friends about how easy it is to make delicious ice cream with the Ninja Creami, I was super keen to make the Coconut Chai dessert. However, I should have known what my daughter was going to choose from the moment I read it out.
Peanut Butter Cookie Milkshake.
Nothing else stood a chance!
Creating a Peanut Butter Cookie Milkshake with the Ninja Creami Ice Cream Maker
Now, I should point out that this recipe calls for vegan ingredients. However, I admittedly made a little alteration.
But more on that in a moment.
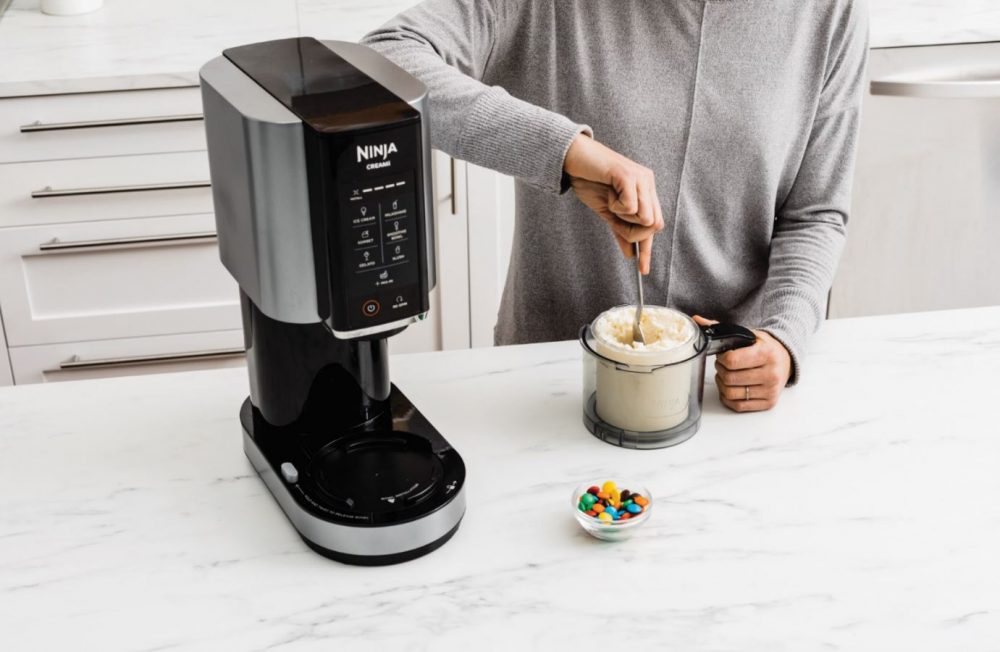
Firstly, I had to grab one of the three included Creami Tubs. And, into the Tub, I added vanilla coconut milk ice cream.
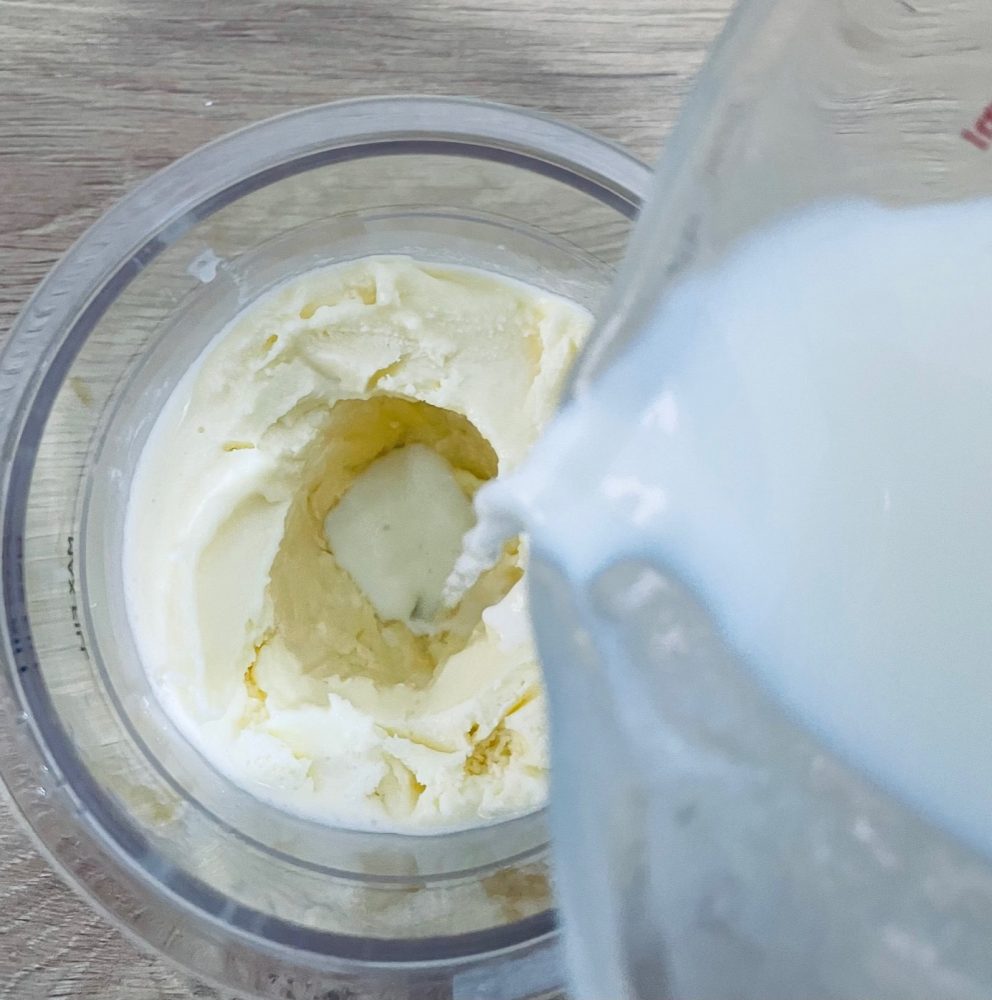
With the vanilla coconut milk ice cream in the Tub, I created a hole in the centre and added in milk – which is where my ingredient-switch came in. Instead of adding in oat milk as the recipe called for, I added in regular dairy – meaning we certainly couldn’t claim this was a vegan creation.
Finally, we added in peanut butter and broken bits of vegan choc chip cookies.
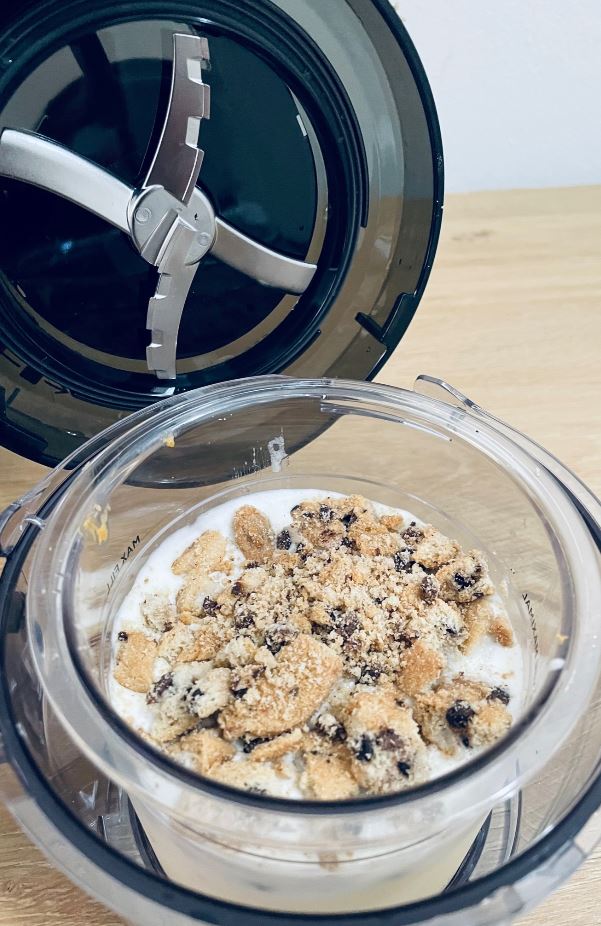
With the ingredients added, I inserted the Tub into the Ninja Creami’s outer bowl and added the lid – with the Creamerizer™ Paddle attached.
Next, I installed the outer bowl in the Ninja Creami Ice Cream Maker – twisting counter-clockwise to raise the platform and lock it in place.
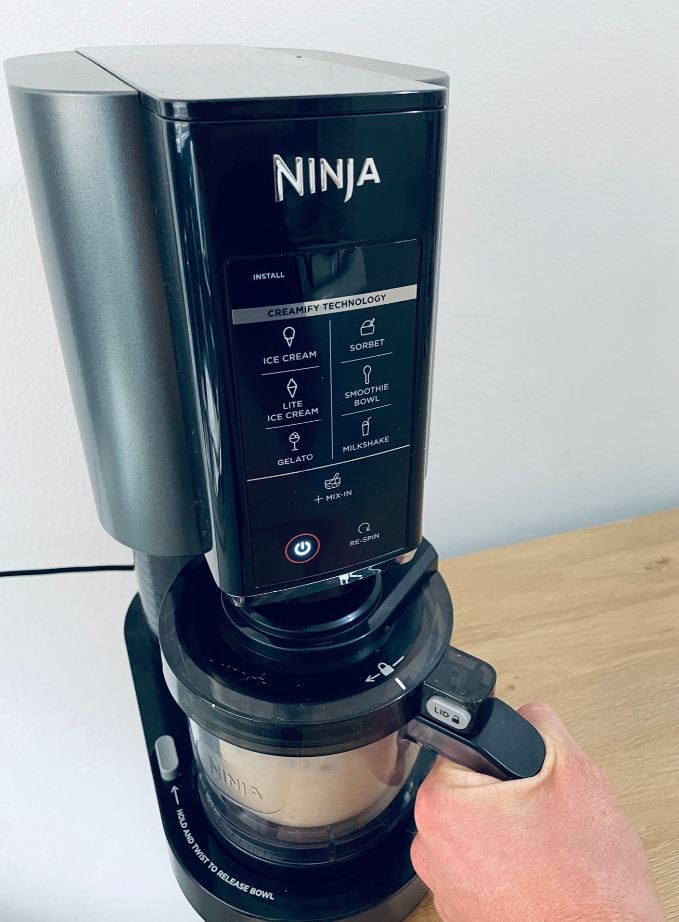
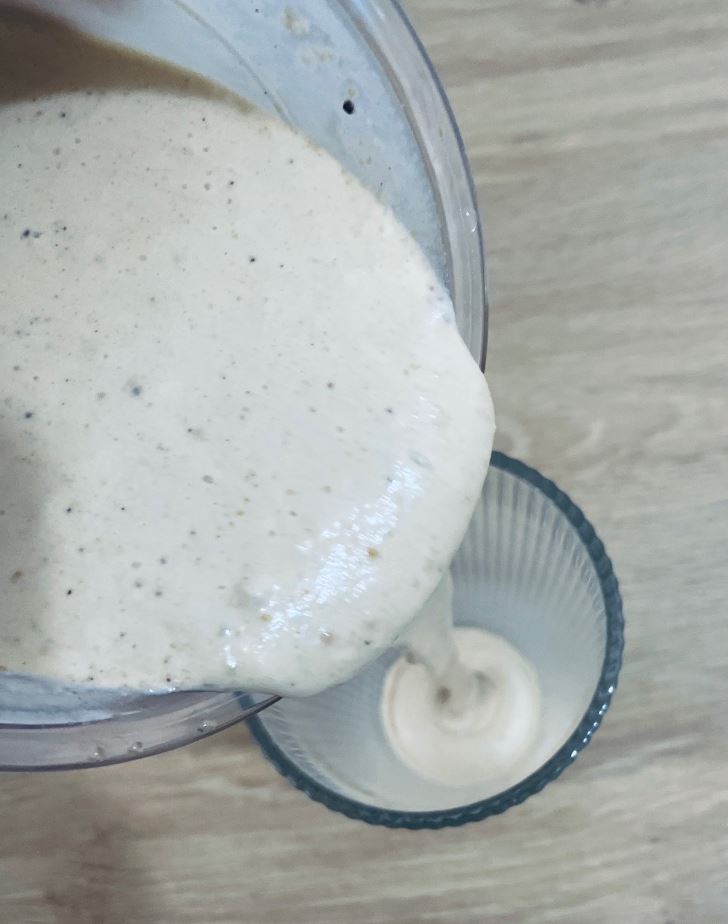
All that was left to do was to press the milkshake function button and then we were off!
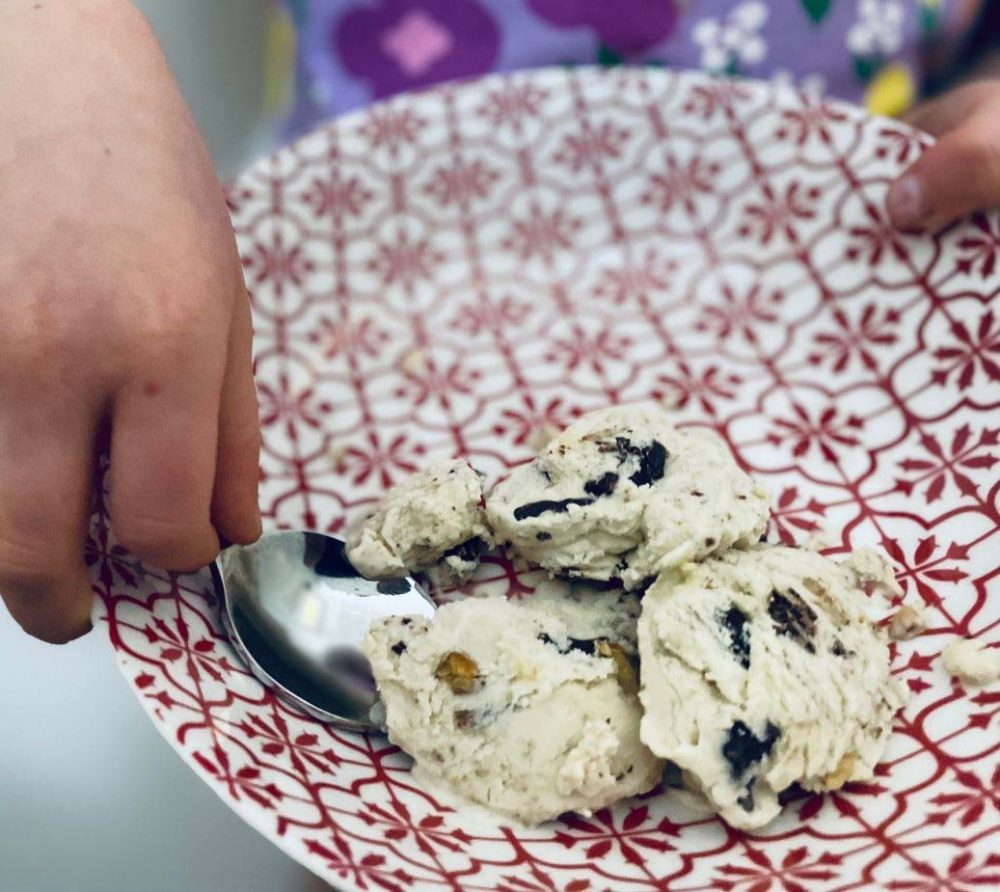
In moments, the Peanut Butter Cookie Milkshake was ready. And it looked glorious.
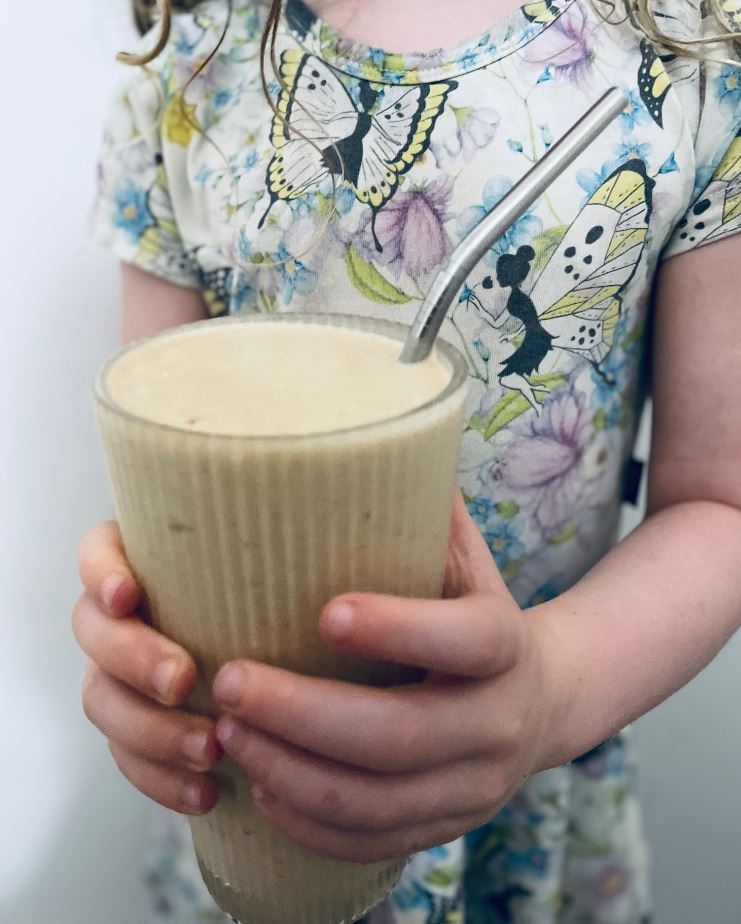
A 5-Year-Old’s Review of a Peanut Butter Cookie Milkshake made with the Ninja Creami Ice Cream Maker
Just as I was having a sneaky sip of the Peanut Butter Cookie Milkshake, my wife caught me.
“Hey! I want some of that”.
She loved it just as much as I did.
“That’s so good! It tastes like a drink you’d get at a boutique café.”
A huge tick from the adults. However, more importantly, what did the five-year-old think?
“This tastes really, really yummy”.
She then gave me a big thumbs up, giving the Ninja Creami Ice Cream Maker’s Peanut Butter Cookie Milkshake her seal of approval.
The full Ninja Creami Ice Cream Maker Peanut Butter Cookie Milkshake recipe is featured at the end of this article.
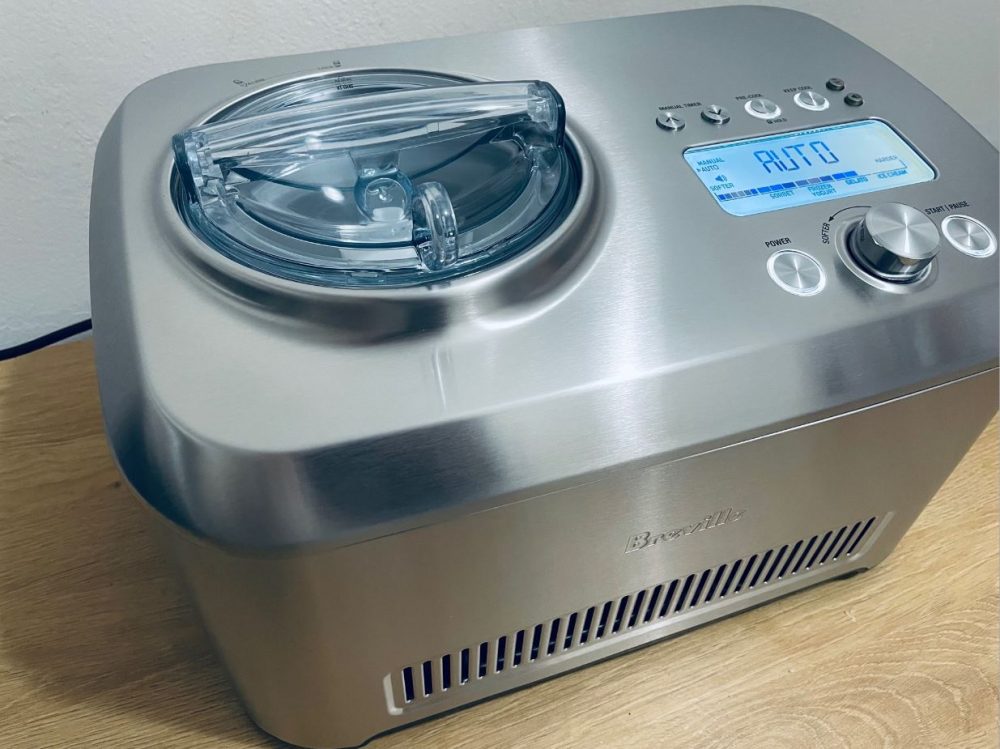
Dessert Maker #2: Breville the Smart Scoop Ice Cream Machine
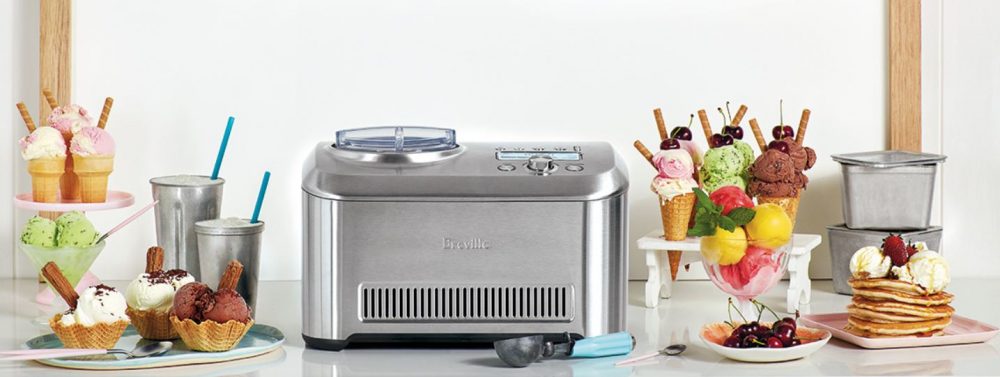
What’s awesome about Breville the Smart Scoop Ice Cream Machine
• You can choose from 12 hardness settings for your dessert, from very soft sorbet to hard ice cream. The Smart Scoop will automatically detect when the dessert being created has reached the desired level of hardness – the first Ice Cream Maker to do so.
• A ‘Mix In’ feature allows you to add chocolate chips, fruit, or other additional ingredients during the churning process.
• You can pre-cool your mixture to optimal temperatures before creating the dessert – and you can use the ‘Keep Cool’ function to maintain the optimal serving temperature for up to 3 hours after creation.
• Will alert you when it has pre-cooled or when your dessert is ready.

Which dessert to make with Breville the Smart Scoop Ice Cream Machine?
There are four main styles of desserts to create with Breville’s the Smart Scoop Ice Cream Machine: sorbet, frozen yogurt, gelato and ice cream. For each style, you have an endless array of possibilities in terms of flavours.
Breville have included some cracking recipe ideas for each style of dessert in the Smart Scoop’s instruction manual.
To help my daughter decide what we should create, I again listed few of the suggestions.
Strawberry and Rhubarb Ice Cream. Pear and Vanilla Sorbet. Lemon Honey Frozen Yogurt.
She wanted to make them all – but there could only be one winner: Passionfruit Gelato.
Creating Passionfruit Gelato with Breville’s the Smart Scoop Ice Cream Machine
As a huge fan of passionfruit, I couldn’t wait to start working on this gelato recipe from Breville.
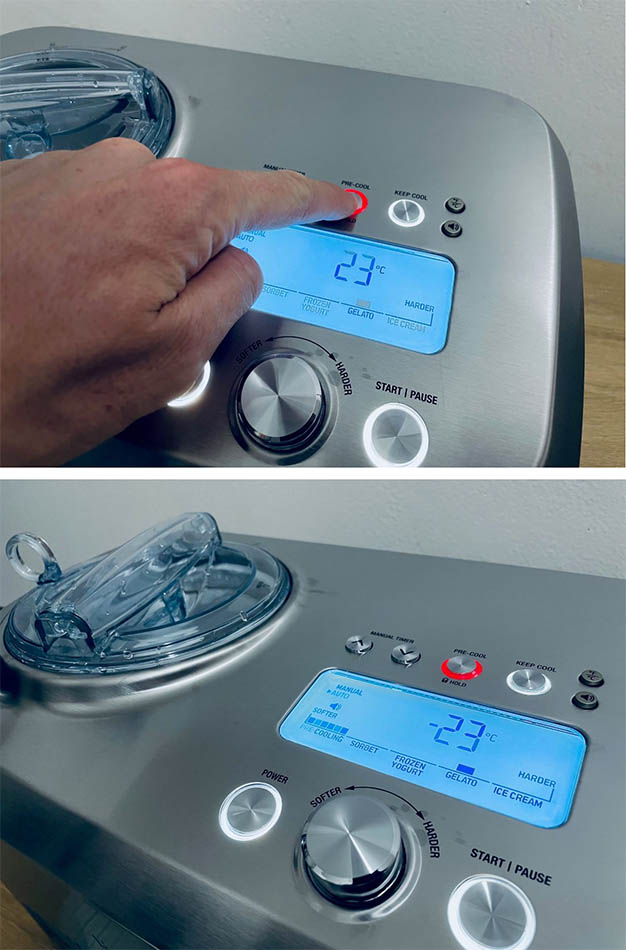
The first thing I did when switching on the Smart Scoop Ice Cream Machine was to press the Pre-Cool button. In minutes, this had the Breville dessert-maker at the perfect temperature for creating gelato.
After turning the knob to the medium-hardness gelato function, I poured in the mixture I’d made earlier – featuring milk, cream, vanilla extract, sugar, and eggs (I need to work on my egg-tempering skills!).
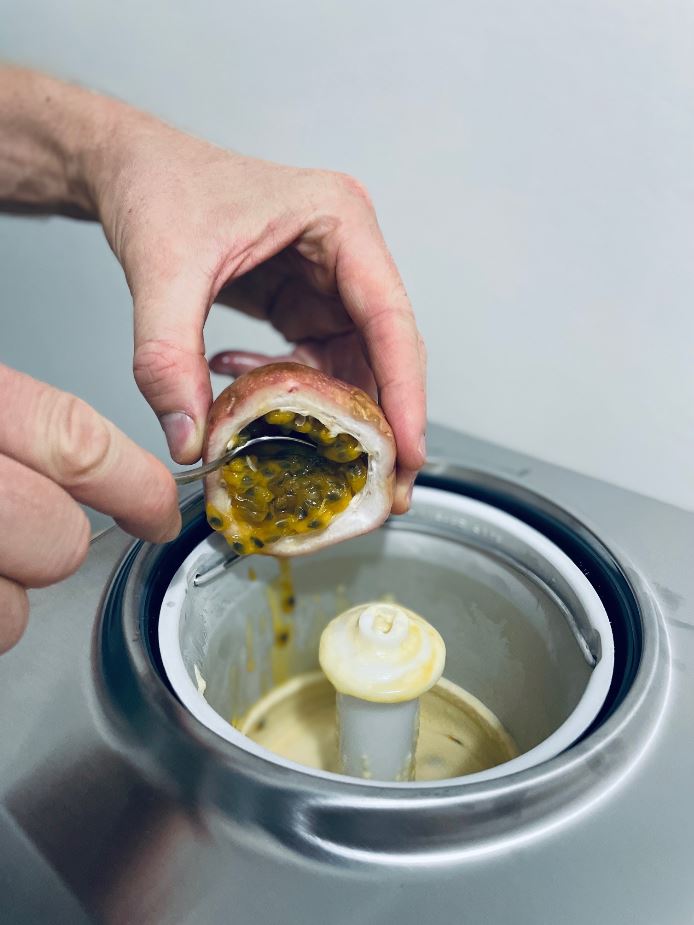
With the mixture in, I added passionfruit pulp to the Smart Scoop’s bucket.
I then shut the lid and left the room, as Breville’s the Smart Scoop Ice Cream Machine churned.
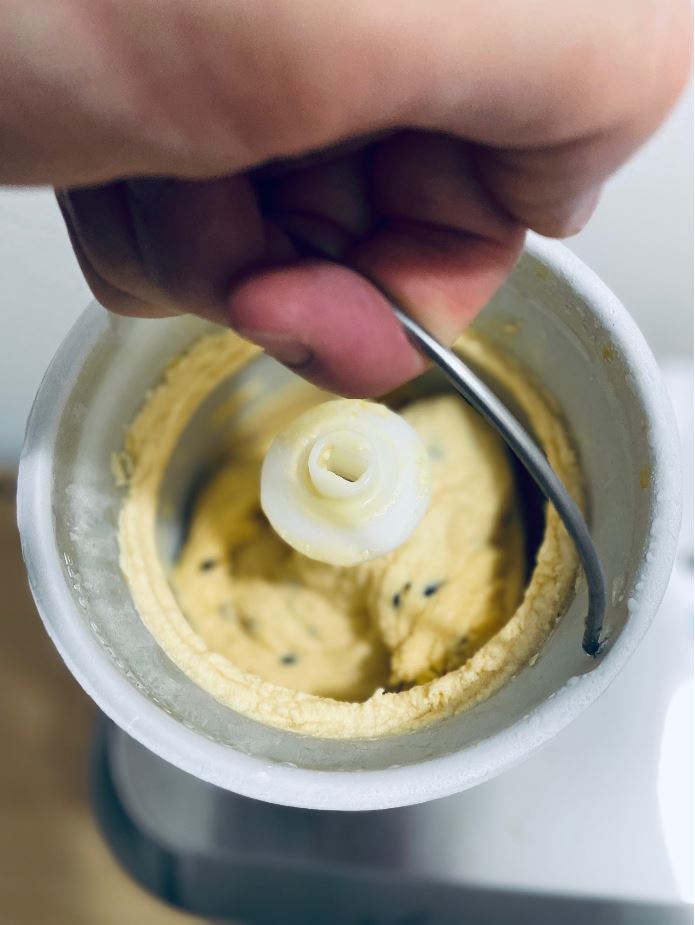
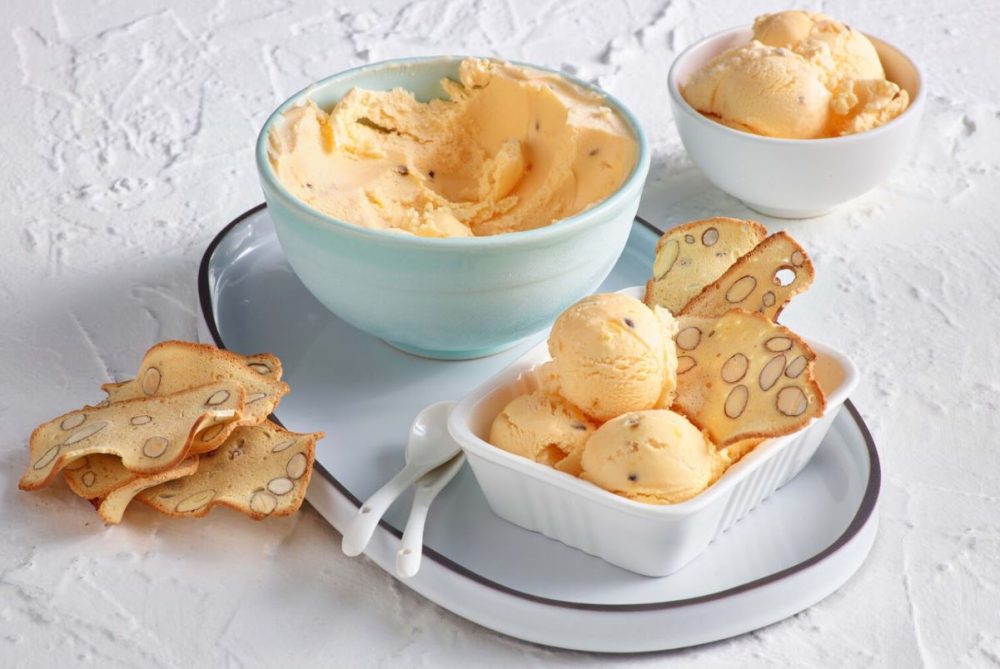
My daughter and I returned to the kitchen upon hearing the chime of the Smart Scoop, letting us know the Passionfruit Gelato was ready – with perfect consistency.
A 5-Year-Old’s Review of Passionfruit Gelato made with Breville the Smart Scoop Ice Cream Machine
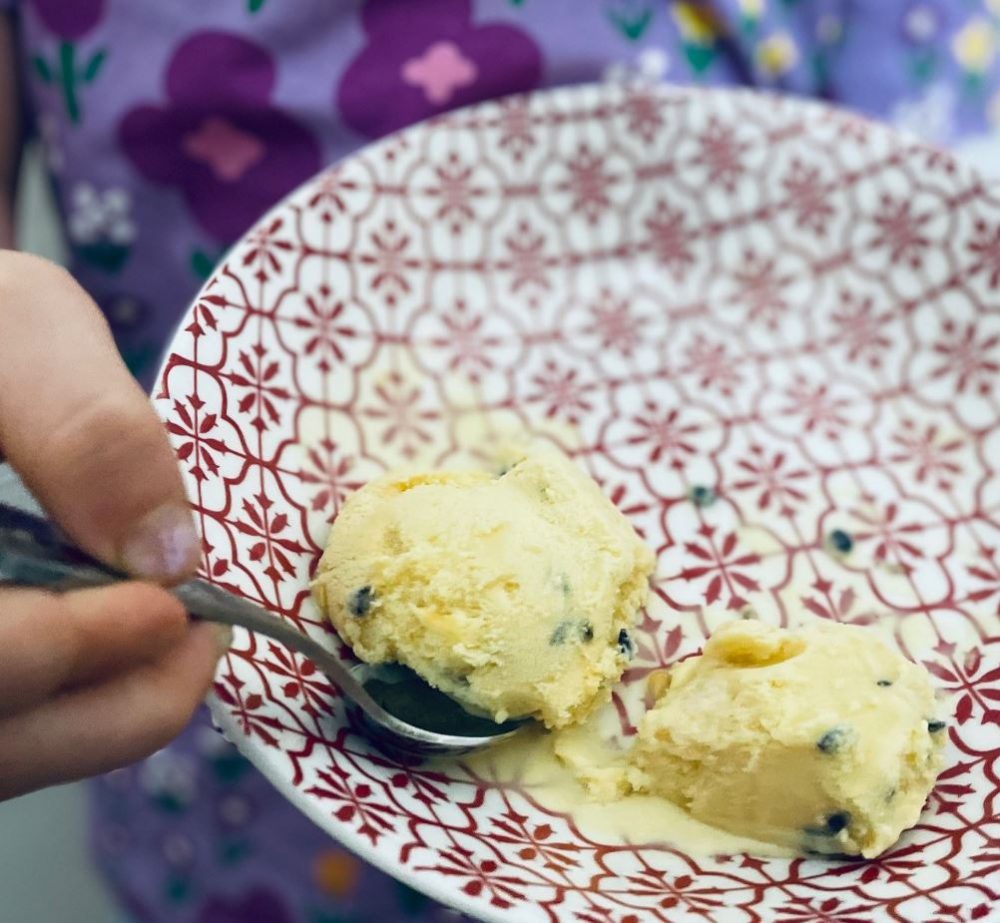
Before dishing up my daughter’s serve, I again had a sneaky taste for myself. It was delightful – passionfruit really does work so well in gelato and other desserts. Importantly, the texture was also wonderful. Breville the Smart Scoop’s auto function had done an incredible job in determining when the perfect gelato hardness-level had been reached.
Enough about my thoughts, however. What did my daughter think?
“It was also very, very yummy!”
The full Breville the Smart Scoop Ice Cream Machine Passionfruit Gelato recipe is featured at the end of this article.
Dessert Maker #3: Cuisinart Cool Scoops Ice Cream Maker
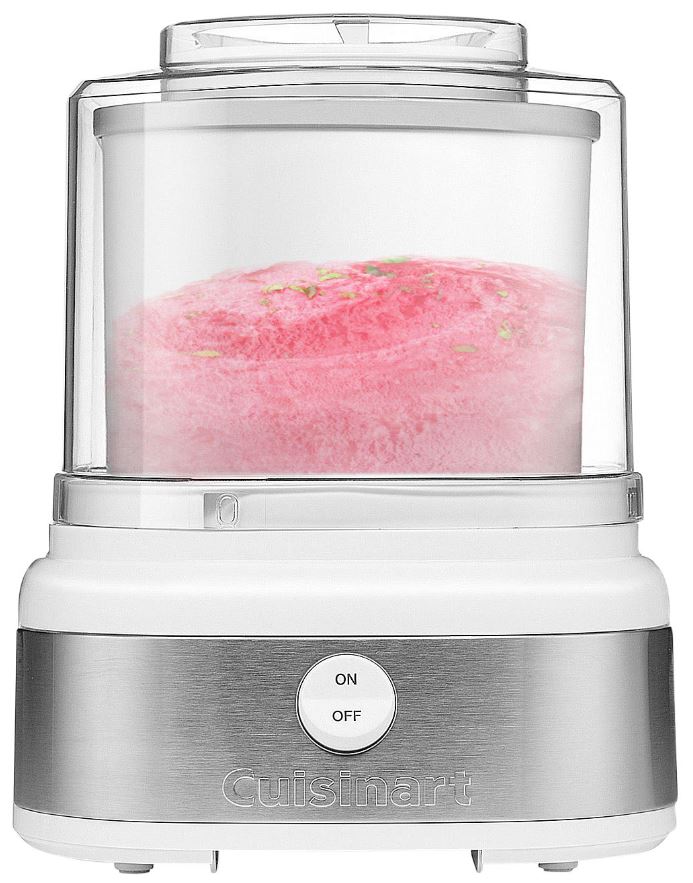
What’s awesome about the Cuisinart Cool Scoops Ice Cream Maker
• Works quickly thanks to a heavy-duty motor, meaning you can create your favourite chilled dessert in 20 minutes or less.
• 1-button operation makes it simple to use.
• Features a mix-in opening that lets you add extra ingredients throughout the churning process.
Which dessert to make with the Cuisinart Cool Scoops Ice Cream Maker?
Like the previous dessert maker we looked at, the Cuisinart Cool Scoops lets you create ice cream, gelato, sorbet or frozen yoghurt. And you can be as creative and varied as you want when it comes to flavours.
If you’re looking for some inspiration to kick things off, the included instruction manual is again a great place to turn to. Cuisinart have provided some mouth-watering frozen dessert ideas.
Dark Chocolate Sorbet. Mango Frozen Yogurt. Espresso Gelato.
But which one did my daughter choose for us to make with the Cuisinart Cool Scoops Ice Cream Maker?
She simply couldn’t go past Banana Walnut Chip Ice Cream.
Creating Banana Walnut Chip Ice Cream with the Cuisinart Cool Scoops Ice Cream Maker
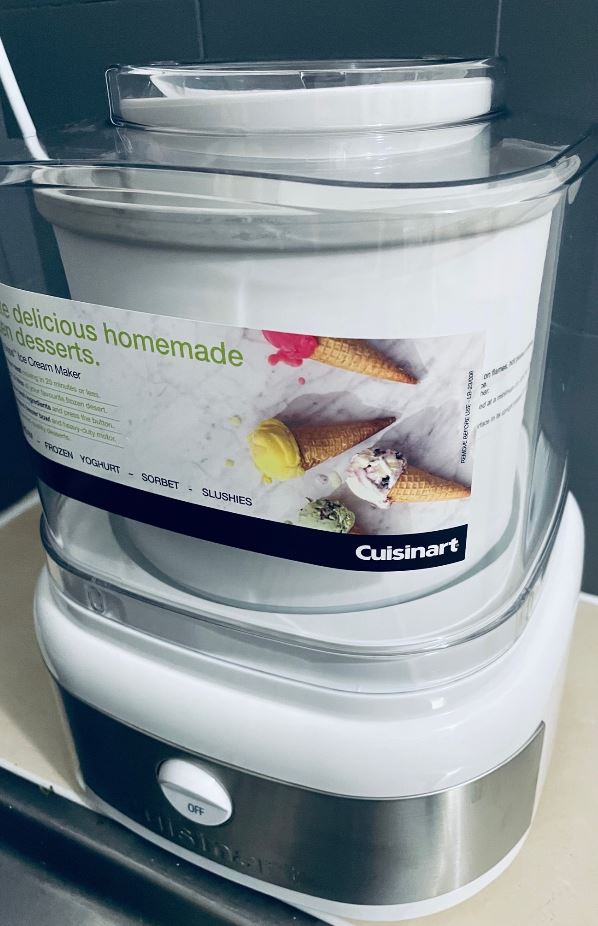
A day prior to using the Cuisinart Cool Scoops Ice Cream Maker, I placed the included Double-insulated Freezer Bowl in our freezer.
With the liquid between the walls of the bowl now frozen, the Cuisinart Cool Scoops Ice Cream Maker was ready for us to create Banana Walnut Chip Ice Cream. And, again, we couldn’t wait!
Eagerly, we inserted the bowl and paddle onto the appliance. Next, we switched the ice cream maker on and poured in the mixture we had prepared earlier. This particular mixture featured cream, milk, vanilla extract and salt, bananas and lemon juice.
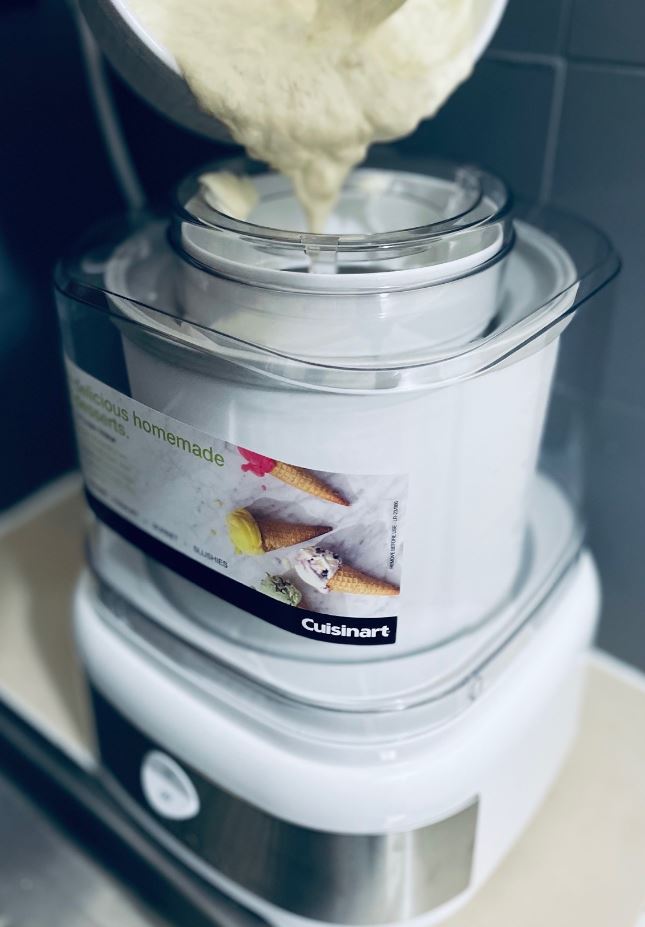
The Cuisinart Cool Scoops Ice Cream Maker began to churn the mixture into ice cream.
After 10 minutes, with the ice cream almost ready, I mixed in the banana, butter and sugar syrup I’d made earlier. Now, I should note that the recipe also calls for rum to be added to the syrup – but since this was being made for a 5 year old, it felt like that was an ingredient we could skip this time around.
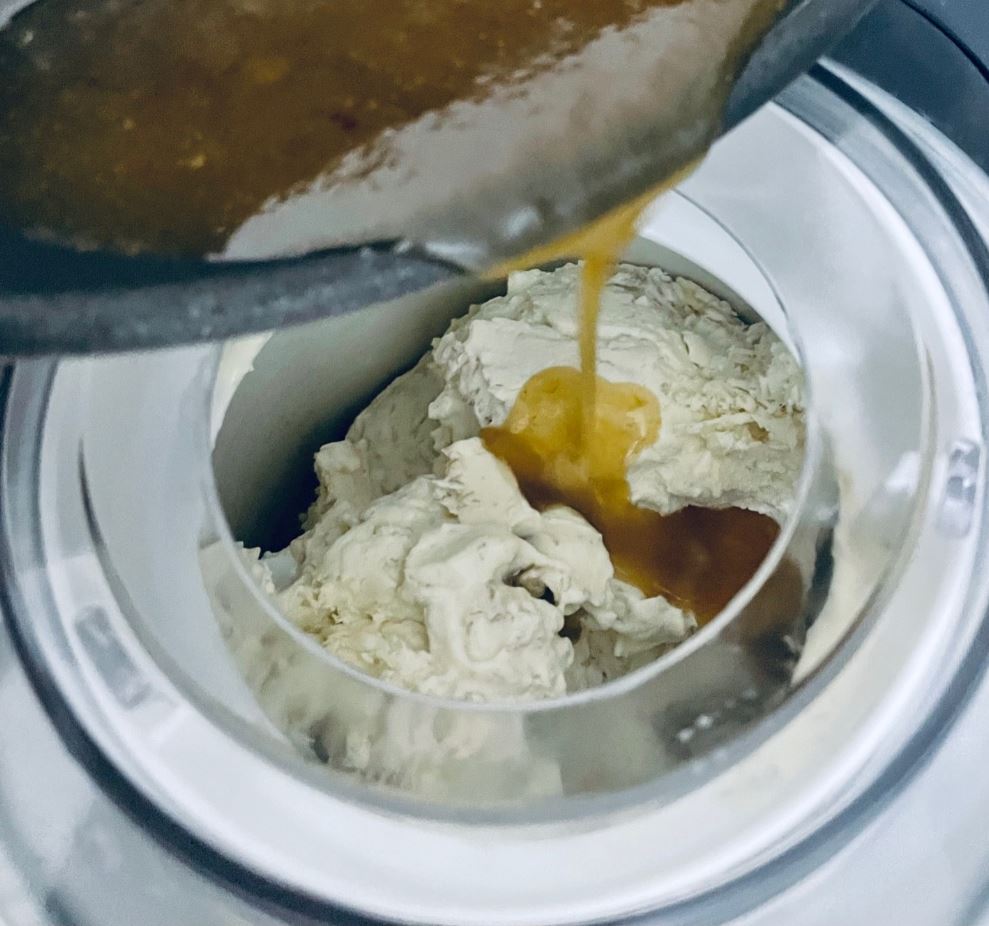
Next, I mixed in walnuts, followed by chocolate that I’d been melting while the Cuisinart Cool Scoops Ice Cream Maker had been churning.

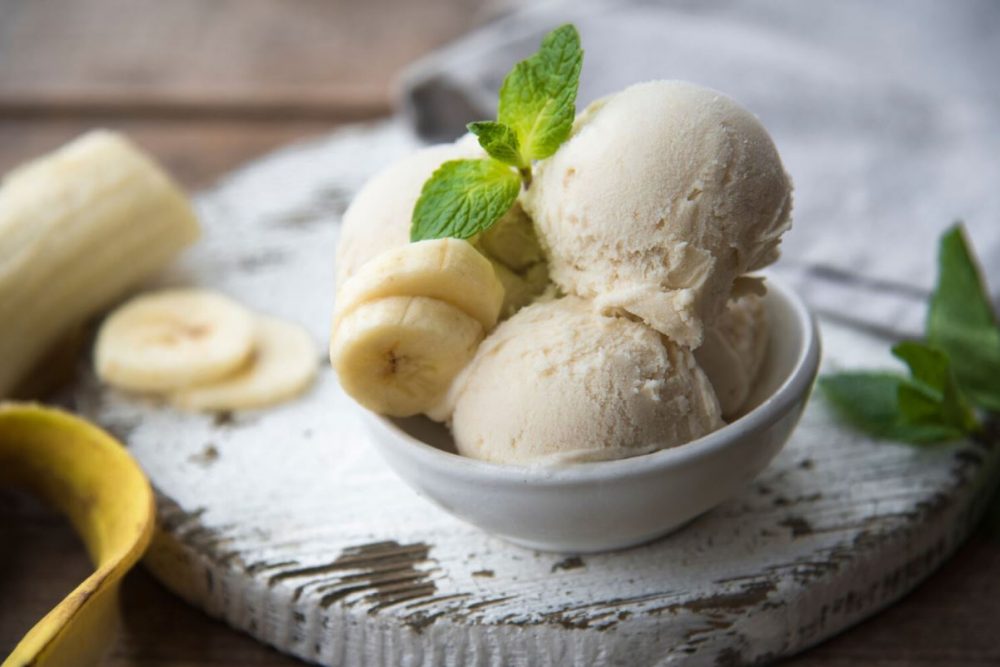
Then, voila, the Banana Walnut Chip Ice Cream was ready – with less than 15 minutes of churning time required.
A 5-Year-Old’s Review of Banana Walnut Chip Ice Cream made with the Cuisinart Cool Scoops Ice Cream Maker
Of course, I had my traditional sneaky bite before giving it to my daughter. And, I’ve got to say, I loved it! Perfect texture and the taste was divine. I was very curious about what the rum would have added to the already superb flavour.
As for my daughter’s review of this Banana Walnut Chip Ice Cream made with the Cuisinart Cool Scoops Ice Cream Maker? You guessed it…
“This one’s also so yummy!”
The full Cuisinart Cool Scoops Ice Cream Maker Banana Walnut Chip Ice Cream recipe is featured at the end of this article.
Shop Dessert & Ice Cream Makers Today
Ready to create your own delicious desserts at home? Shop Harvey Norman’s ice cream maker range online or in store today and get creative with flavours. Feel free to ask your kids for suggestions – if you dare!
Vegan Peanut Butter Cookie Milkshake Recipe for Ninja Creami Ice Cream Maker

Ingredients
• 1 1/2 cup vanilla coconut milk ice cream
• 1/2 cup oat milk
• 1/4 cup peanut butter
• 3 vegan chocolate chip cookies (approx. 2 ounces), broken, for mix-in
Method
1. Place ice cream in an empty CREAMi™ Tub.
2. Use a spoon to create a 1 ½-inch wide hole that reaches the bottom of the Tub. Add the remaining ingredients to the hole.
3. Place Tub in outer bowl, install Creamerizer™ Paddle onto outer bowl lid, and lock the lid assembly on the outer bowl. Place bowl assembly on motor base and twist the handle right to raise the platform and lock in place.
4. Select MILKSHAKE.
5. When processing is complete, remove milkshake from Tub and serve immediately.
Passionfruit Gelato Recipe for Breville the Smart Scoop Ice Cream Machine
Makes approximately 1 litre.
Ingredients
• 2 cups milk
• ½ cup pouring cream
• ½ teaspoon vanilla extract
• 5 egg yolks
• ½ cup caster sugar
• 2-3 passionfruit
Method
1. Place milk, cream and vanilla extract into a medium heavy-based saucepan. Heat until mixture just starts to simmer.
2. Meanwhile beat egg yolks and sugar in a bowl until pale and thick. Once milk mixture is hot, slowly whisk into the egg mixture.
3. Clean saucepan and return mixture back to a low heat. Stir constantly with a wooden spoon until mixture has thickened and coats the back of the spoon (see tips for better ice cream making.).
4. Pour mixture into a heatproof bowl, cover and refrigerate until well chilled.
5. Pour mixture into ice cream bowl with passionfruit pulp. Set ice cream maker to desired setting and churn.
6. Once mixture is frozen transfer to a freezer safe container and freezer for up to 1 week.
Banana Walnut Chip Ice Cream Recipe for Cuisinart Cool Scoops Ice Cream Maker
Makes about 4½ cups (nine, ½-cup servings).
Ingredients
• 2 cups heavy cream
• ½ cup whole milk
• 1 teaspoon pure vanilla extract
• ¼ teaspoon salt flakes
• ¹∕³ cup packed, dark brown sugar
• 1 tablespoon water
• 2 tablespoons unsalted butter
• 2 large bananas, cut into 1.2 cm pieces
• 1½ tablespoons dark rum
• ¼ teaspoon fresh lemon juice
• ¹∕³ cup chocolate chips (bittersweet)
• ½ cup toasted walnuts, roughly chopped
Method
1. In a medium bowl, use a hand mixer on low speed or whisk to combine the cream, milk, vanilla extract and salt. Reserve.
2. In a large frypan set over medium heat, cook the sugar with water until it begins to sizzle. Stir in the butter and cook until melted. Add the bananas; cook for about 2 minutes, or until fragrant and softened. Carefully stir in the rum and cook at a strong simmer for an additional 2 minutes, or until slightly thickened. Remove from heat. Using a slotted spoon, strain the banana/sugar mixture, reserving the sugar syrup and bananas in separate bowls.
3. Stir the lemon juice into the bananas and then mix the bananas into the steeped milk/cream. Cover and refrigerate a minimum of 2 hours, preferably overnight. Whisk mixture together again before pouring into the Cool Scoops™. NOTE: If you are not freezing the ice cream the same day, cool the sugar syrup to room temperature. Warm prior to freezing ice cream to liquefy the syrup.
4. Turn on the Cuisinart® Cool Scoops™; pour the banana mixture into the frozen freezer bowl and let mix until thickened, about 10 to 12 minutes.
5. While ice cream is churning, melt the bittersweet chocolate in a bowl set over a pot of simmering water; reserve.
6. When the ice cream is almost fully churned, gradually add the sugar syrup; let mix until fully combined. Once the sugar syrup has been mixed, add the walnuts through the top of the Cool Scoops™; let mix until combined. Right before the ice cream is done, drizzle the melted chocolate into the churning ice cream. The ice cream will have a soft, creamy texture. If a firmer consistency is desired, transfer the ice cream to an airtight container and place in freezer for about 2 hours. Remove from freezer about 15 minutes before serving.